Part One is here: http://cpo1.wordpress.com/2009/10/04/stratocaster-makeover-intro-and-part-one/
Part Two of the Stratocaster makeover consists of a complete re-gut and electronics upgrade. I changed all three pickups to Dimarzio's Area 58s (neck and middle) and 61 (bridge). Here's some info about the pickups: http://www.guitarworld.com/article/dimarzio_area_58_and_area_61_pickups. The biggest benefit of these pups is the noiseless operation. Single coil pickups are notorious for noise (or hum). In fact, humbucking pickups were designed specifically to cancel out the noise (or "buck" the hum).
Playing guitar in a setting where the sound tech isn't familiar with the normalcy of strat hum could induce a situation where you're needlessly turned down at the board to cut the noise if caught humming during a low-intensity moment in a song. Alternatively, perhaps a noise gate is used to limit the perhaps unfamiliar buzz. Managing this as a player requires constant control of the volume - turning down the guitar when not being played. Another method of coping is to just avoid using the pickups in single mode (any three of the pickups selected alone - positions 1,3,5) and only use the guitar in dual-pickup mode (a la humbucking) by selecting positions 2 or 4. Sadly, this ended up becoming my coping mechanism...and my guitar tone suffered as I was limited to only those two positions.
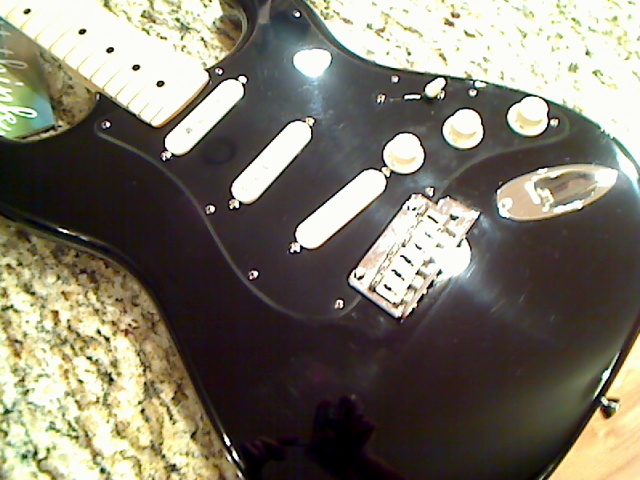
Enter in the Area 58/61 pickups...noiseless. I have seen way too many people demo or sing praises of these pickups to not make this change. Once installed, I should be able to use any of the five pickup positions on the guitar without introducing additional noise. I bought the pickups at a Sam Ash in Atlanta. They didn't have them in stock, but ordered them and shipped them to my house. I decided that since I was changing pickups, I was going to get rid of the rest of the bright white parts on my guitar. I ordered the pickups in the "Aged White" color. This is basically a yellowed/beige off white color that is meant to replicate a vintage white that has seen some age. I think it tones down the brightness of the straight white. Of course, I had to get new knobs and switch covers to match.
As I mentioned at the end of PART ONE, I had some concerns about the quality of my shielding job on the body of the guitar. I decided that before I did anything, I would take a look at that. The shielding is supposed to help reduce noise from interference, but I honestly didn't notice any difference. I used a multimeter to test the continuity of all the shielding I applied, and was surprised to find a section that wasn't effectively shielded. Here is a quick video of this process to save me some typing:
So, moving on...
I ordered a wiring kit from RS Guitarworks (www.rsguitarworks.net). I used their kit in my Les Paul, and it worked out great, so they got my business again when it came time to tinker with the Strat. I bought the Complete Premium Vintage Strat Style Electronics Upgrade Kit. It comes with the following components:
Also in the kit (not advertised) was an "optional" .047 treble bleed capacitor. This is supposedly not required for those looking for the treble bleed function (allows the retention of some highs when turning down the volume). I was, in fact, looking for treble bleed circuitry, so I decided to install it while I was putting the rest of the kit together.
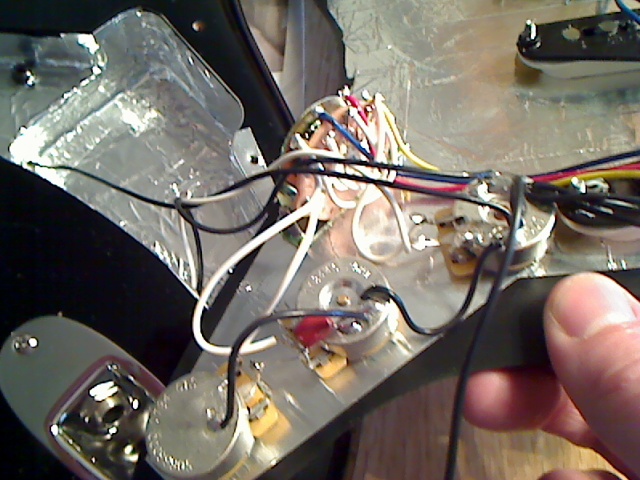
Here's a peek at the factory wiring before I stripped it all out:
The first thing I did to get started was to attach the new tone and volume pots to a piece of cardboard in the same configuration they would be in the guitar. This allows me to solder most of the attachment points before attaching them to the plastic pick guard (and without them moving around). Soldering grounds to the back of the pots requires heating them up a bit for the solder to take (not too much!) and I didn't want to risk any heat transfer to the pick guard for fear it might warp.

I got most of the connections made (and added some ground blobs on the volume pot) before moving it to the pick guard. Still left at this point is the pickup, input jack, and bridge/body ground wiring. Check out the size of that Jenson capacitor (gold) compared to the tiny ceramic tab of the factory setup (red in above picture)!
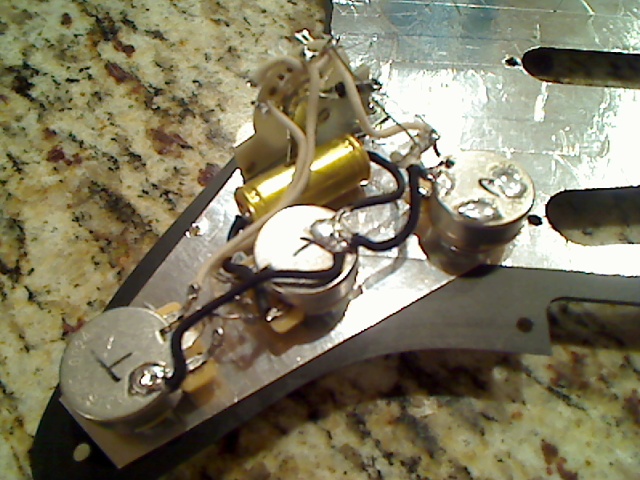
You may notice I wired the bottom tone pot to the bridge pickup and the middle tone pot to the neck pickup. I left the middle pickup wide open with no tone control. This seems to be a popular configuration.
Next, I wired in the pickups. I tried my best to make the wiring clean with shrink wrap when possible to keep the wired bundled down the center.
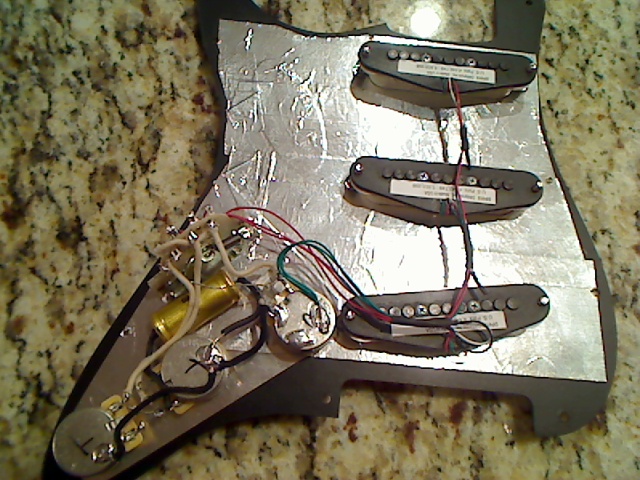
Here is the complete wiring job, with ground and jack connections in place. Also, note the added treble bleed capacitor (white) connected to the volume pot lugs (just below the gold Jensen capacitor in the picture:

Here is the guitar all back together. It's sorta hard to tell from these low quality pics, but the "aged white" look is a little mellower and looks much better in my opinion.
The next thing I did was to work on the guitar setup. I put fresh strings on, adjusted neck relief (as flat as I could get it), and all the bridge adjustments, string height, and intonation. When I bought the guitar, the bridge adjustment was a bit out of wack...and this was my first time to really go through every component piece by piece. I made my own radius gauge from cardboard and then used that to have the strings (adjusted at the bridge) match the same radius as the neck. Oh, while I was at it...I added a fourth spring to the tremolo claw and the bridge to tighten up the trem a bit. This pulled the bridge back flush to the body rather than floating. I used aftermarket springs that were stronger than the factory springs, so I went with a "two and two" approach:

So after all the setup was complete..it was time for some testing. Thankfully, all of the electronics worked as expected! It looks like all of my work paid off. There was no noise from the single pickup positions at all...sah-weet! That's what I was looking for. I tested all the controls and made sure everything worked. It all did, however, I wasn't happy with the volume control.
The theory behind the volume control (particularly with regard to the treble bleed) is that you can turn down the volume on the guitar a bit and actually control the output to the amp and thus reduce some of the gain. With the treble bleed, you can retain most of the highs as you roll back the volume...so the sound of the guitar doesn't really change -it just cleans up a bit. So volume 10 = distortion; volume 7 = less distortion (but same overall sound and perceivable volume level). This is the expected behavior...but the reality of my configuration was that there was little change in gain level from 10 to about 4! The distortion didn't clean up til that point, and then the volume began to drop (perceivable) after that point. I didn't like that.
Knowing that the super pots from RS Guitarworks was designed to retain some of the highs (rendering the additional treble bleed cap unnecessary) I decided to pull it back apart and remove the second cap. I loosened the strings up, and slipped the pick guard out and removed it. Here is a look with the cap installed:

And after removal:
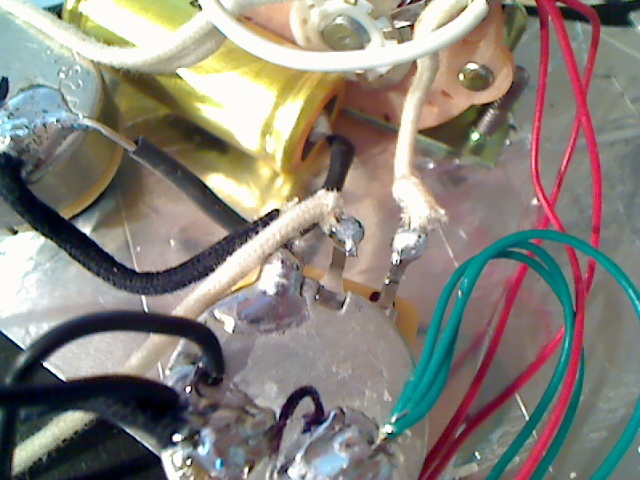
Soldering is so much fun! Anway...the end result was much more like I anticipated. There was a gain roll off around 7 and volume decline after that point. Perfect. So...that's it. I'll play it like this for a while and see what I think. I love to tinker, so I can't guarantee how long it will be before I pull it apart again.
Oh, by the way...if you are interested in a trick to work on Strat electronics without removing the strings, you can place a capo at the first fret and then loosen the strings enough to ease the pick guard out. The capo holds the strings in place so they don't get all out of whack when they are loose:


No comments:
Post a Comment